Saturday, March 30, 2019

What to do without Walmart?

Brooke Gottmeier 
Spain - Comillas Universidad 
Spring 2019 

I don't even shop at Walmart that often back home. Occasionally, I make a trip to Target, but both superstores are somewhat of an oddity for me. I go there if I need a new charger for my phone, or cheap plates for my kitchen, or new bed sheets—every time whatever I’m looking for is completely random and I always tend to find it. 

However, shortly after I got to Spain I realized that there was no superstore here. I needed all of these random things like tights, and nail polish, and kitchen utensils, and stamps, but I had no clue where to find them. 

One of the first situations that I encountered with this dilemma was with my great journey to find tights. Being that Spain is cold and Hawaii is not, I owned none of these elusive articles of clothing. 

I went to buy some at the Zara near my house and left empty handed. Next, I went to the underwear store—nothing. I tried the closest thing we have to a department store here in Spain, El Corte Inglés, but I only found handbags and watches. 

Yet, on the streets all around me were girls were wearing tights! I had absolutely no clue where they were getting them! Being that I was in Spain, Amazon could not save the day this time. So, I spent the rest of the week frustratingly trying different stores and keeping my eyes out for the secret tight superstore. 

Finally I broke down and decided to ask the “stupid question”:

So, I asked my host mom, “¿Dónde compras medias?”.
She replied, “A la merceria medias”. 

After she gave me directions, I headed over to the merceria medias and was surprised to find the cutest little store jam packed with tights in every inch of it. So this was were everyone was getting them… 


I got a pair and headed home feeling relieved and slightly accomplished for figuring out the mystery. 

Though my great journey to find the elusive Spanish tights, I learned several things that I’d love to share with you guys so you don’t run into the same situation:

  1. JUST ASK FOR HELP! No question is stupid. You are in a new country where everything, including the language, is foreign to you. Don’t be afraid! Most people are more than willing to help you out, so even if it’s a stranger just ask. 
  2. We are very spoiled in the U.S. with giant superstores and Amazon to answer our every need. 
  3. In Europe if you can’t immediately think of where to buy something, it’s likely being sold at a tiny little specialty store. To find it either (A) ask for help or (B) try translating the name of what you are looking for and then google it. If you just google it in English, you likely won't find the best results. 
  4. Try not to get frustrated! You will find everything in time, and adjusting to these difference is just a part of life while abroad. To me, I found the tights situation hilarious. The fact that they have a whole merceria just for tights here I found to be so cute and funny. Try to take everything lightly! It’s all a process. 

Wednesday, March 27, 2019

Buses, Planes, and Trains, Oh My


Tokyo, Japan known for its beautiful sky line, neon lights and.... rice paddies?

When I flew into Japan I landed at Narita airport, which is an hour outside of Tokyo. The only view you get is rice paddies, small towns, and greener for miles, which has a natural beautiful.

After departing the plane you have to go through immigration before being directed off to a room that is on the back wall with one room and and a desk in order to get your residency card.The whole process is fast and easy, you just hand over your documents, scan your fingers and then bam, you got yourself a brand new card. This card will act as your ID card in the country so you do not have carry around your passport if you don't want to.
P.S. The room has a no cellphone use policy so don't be like me and use your cellphone and get stared at by the other people in the room. 😨

Luckily for me, my buddy met me at the airport to help me with the next step of my arrival journey, getting to my place of residence. Due to Aoyama Gakuin assigning you a tutor/guide/buddy before you leave, you are able to have a local's advise, knowledge, and assistance. I HIGHLY recommend you take advantage of that and ask them about anything and everything. Also ask them if they would mind meeting you at the airport. My amazing buddy Soari, better known as Tommy, helped me so much.

I know that many people,myself included, can figure it out on our own if we have to, but why not have help. I know I was kinda of tried from my long flight, and it is a daunting task to figure out not only a foreign public transportation system, but what do with your luggage and where to go, and being slightly starstruck in this new place.

Now the next thing you should think about is cash and what to do with those pesky bags of yours. I recommend keeping either your carry on or whatever small bag you have, and filling it with a two days worth of clothes and send the rest to your residence via the baggage delivery services in the airport. There two companies just to left of the main lobby once you come out of customs. Now the cost depends on how many bags you have and how heavy they are. For me I had a medium and large suitcases both just under 50lbs., for which I paid about $45. Now that may seem a bit much but I was happy because it freed up my hands, made my journey easier, and it was nice not to worry about it.

For more info check out the list on the Narita airport website.
Another tip make sure you get a drop off time from the company you pick encase there is no intercom or front desk attendant to receive your luggage at your place. This is because if no one is there they will not drop off your luggage and you will have to call and reschedule a new drop off time.

Next thing is getting ¥ (yen). It easier to get ¥ (if you don't already have it) in the airport, remember Tokyo is mostly cash operated, so it is best to have cash whenever possible (plus it saves you from those additional charges banks like give when you use your card).

From that point you can move to planning our route, if you haven't already. When in Japan I agree with most local opinions on NOT taking a taxi until you are much closer to your destination, if at all. The taxi system in Tokyo is much like in America, where it is very expense and better to avoid when possible. There is no Uber, Lift, or any other ride sharing services so will have have to take shuttles and public transportation.  I started off my journey to m new home by riding the hour bus shuttle to Tokyo station, I recommend the shuttle because it is cheaper and drops you off a mere 5 minute walk to the station.

For more information on the different options check out the website.

In the station you can buy your train pass. It costs 1,000¥ to buy the pass its self, and then you can put however much you want. I arrived about a week before the semester starts, which means I had a week before I could get my discount student train pass, so I didn't want to put too much on it. For me I put 1,000¥ on my pass so I can go out and explore before that time. Obviously that cost will change depending on how much traveling you plan on doing before you can get your student pass.

Now when you are on the train it can be very busy, especially if get on the train during rush time. The rush time can go from 7 to 9 in the morning and 5 pm (17:00) to 10 pm (22:00). Also note the stories are true they will squish and cram you into the the train to pack as many people as possible. Which why it is better to have less bags with you, so the easier it will be for to move around the train but also the station.

And again I have to say a huge thank you to Tommy for helping me with that last part, so I say it again get to know your own Tommy if you can and they will be your life saver.

After the we had conquered the trains we sat down and ate at a popular conveyor belt sushi place call
Sushi Roll (スシロル) and had an amazing time with great sushi, especially the cheese and salmon. 😋 Before calling it a night.

またね

Monday, February 4, 2019

Heading Overseas

Elizabeth Jackson

Heading Overseas

Some tips I would like to share before heading overseas to study abroad, which for me was to Australia, are plentiful as I feel the way in which I traveled was the best way to start my study abroad experience. Before I left the country I did extensive research on all areas of the country, the surrounding countries, the culture, the people, and the economy. For me personally this contributed to my experience tenfold because it allowed me to feel mentally prepared for my trip. In addition I researched the best way to sort out my finances which was a huge factor in allowing me to get around as soon as I landed in the country. I opened an international bank account with my local bank branch that you could very easily collect information about prior to your departure. This allowed me to transfer money with minimal fees and helped me to feel as though I was prepared while in a foreign country.

In addition, getting a SIM card was also a very important factor in helping me to feel prepared while I was out of the country which I did while arriving at the airport. Most airports will have fairly cheap SIM cards for purchase that you can load at any time. However, some prior planning is involved when doing this because you must unlock your phone with your US phone carrier in order to activate the SIM which must be done in the country. Having a phone was important for me because it allowed me to access maps, communicate with family, and organize my activities for the day. It’s nice to have access to the internet as well if you ever quickly need information and I would highly recommend getting a SIM as soon as arriving in your country of study.

Another big thing to have sorted when arriving in your exchange country is to get some currency converted, which can be done either at the airport as there are always currency conversion stations or at your local bank before you leave the country. I personally felt better having cash on hand before I arrived at the airport just to be safe but either option works and is definitely a significant part of travel as sometimes credit cards can be canceled. With that being said it is also important to put in a travel notification to your local bank so that they know you are traveling outside of the country and don’t cancel your card.

Overall I would say one of the most simple but helpful things I did before leaving the US was making sure to pack extremely light; I only brought one backpack with me that had everything I needed in it. Traveling light is a huge advantage and simplifies moving from place to place when you don’t have so much to carry with you. Before I went to Australia I traveled around New Zealand and it was the best month of my life. I would highly reccommend doing something like this before or after your study abroad experience as it is good to take advantage of the area you are in and learn more about the environment you will be or have lived in.

6 months of Australia

Elizabeth Jackson

January 06, 2019

6 months of Australia

While studying abroad in Australia I fully took advantage of experiencing as much of it as I could by traveling all over and I believe that that was what made my study abroad experience so amazing. When I landed in Australia I went and stayed with my best friend who is from Byron Bay and I spent two weeks with her and her family. It was the most amazing time and I was able to spend Australia Day with them which is a big day for Australians. Spending the day in a very Australian manner was an amazing way to spend the holiday and get to know the culture of Australia. I was also able to spend my birthday with them and it was easily one of the best birthdays I have ever had. If possible, meeting up with friends or family in your study abroad country is a must do as it brings you comfort to know you have support in a foreign country. After I spent my birthday in Byron Bay my sister flew to meet me on the Gold Coast and we roadtripped all the way from Byron to Melbourne which is a huge trip. Road tripping is something I would highly recommend as it is fairly cheap to hire cars but an amazing way to be able to see so much of your country. We camped along the way (also highly recommend) and spent time in the Australian national parks that are all along the coast. Needless to say it was amazing and an experience to remember.

I also flew to Tasmania which is a more obscure part of Australia and less traveled but was the most beautiful place I have ever been. I came prepared to do a lot of hiking and brought the proper gear for it which I would recommend to anyone who enjoys doing outdoor activities. Buying gear overseas is generally a lot more complicated and expensive because the high charge is for the convenience of it. My attitude while traveling was one that was very open; this is important in order to get to know the people of the country. Most people are very friendly if you put out the same attitude and that was something that made my traveling experience amazing. Again, renting a car is the cheapest way to see the most in my opinion and spending time on the road allowed me a lot of time to myself that I will cherish forever. Having a plan is also an integral part of seeing the most as seeing what you want to see in each area cannot always be achieved if you are not efficient with your time.

In addition, towards the end of the semester I flew to Cairns to dive the Great Barrier Reef and that was also an experience I will never forget. Australia is known for the Great Barrier Reef and being able to experience that was incredible. I would definitely recommend exploring the parts of your study abroad country that it is famous for because while it may be cliche it is still attracting attention for a reason. I also flew to Malaysia for a few weeks during our mid semester break and had an amazing time there, which I thought was amazing because normally I am not in the same part of the world and felt it was smart to take advantage of that while I was there. I would recommend visiting areas all around the country you are studying in and not just the country itself as it is the best way to take advantage of your surroundings.


Maintaining positive mindsets when returning home

Elizabeth Jackson

Maintaining positive mindsets when returning home


January 12, 2019


After living in one place for the duration of 6 months or longer, it’s just natural to form a connection to the place and bond with the people you had met. Assimilating back into the life you had before you went to study abroad can be very difficult if you’re not mentally prepared for it. It’s a huge transition moving from one place to another in this way and I found it difficult personally. I had become so accustomed to the life I had created that I didn’t put any energy or effort into preparing myself to coming back to America. Initially it was very shocking and I wish I had some guidance to help me through what I was going through at the time.

The most important and useful piece of advice I could give on the matter is to always maintain a positive mindset. It will not serve you to think in a definitive way of “I’ll never see these people again” or “I’ll never be back” because as I soon came to find, neither of those sentences were true for me and most likely will not be true for you either. In fact, I am in Australia at the moment and am already planning on going back again in a few months to live indefinitely. It’s easy to get down about leaving your study abroad country but stay positive in thinking and planning on visiting or even moving. Another useful piece of advice is to focus on what you gained from the experience rather than lamenting your departure. While it can be difficult at times because we are emotional creatures, it really helps to contemplate all of the things you have gathered from the experience.

Upon arriving back in America I found that there were a surprising amount of things that were different that I hadn’t been used to and the shock of that was pretty overwhelming at times. Being born in the US I never thought I could experience culture shock to the place I was born but it happened nonetheless. In order to cope with this I tried not to get too focused on the things I didn’t like and just focused on the parts of living in America that I had missed while I was away. There are so many simple joys of being back in the state you are from and I decided to hold onto those things rather than how much I missed Australia. Mindset is everything and circumstances are never permanent; it is up to us how we choose to see the world around us.

Monday, January 28, 2019

The Spanish Student Visa Guide

The Spanish student visa
guide:

Visa―something about the word is daunting. I get overwhelmed just thinking about the
paperwork, and the organization, and the planning that went into getting mine. I think
a lot of the stress I encountered in the process of getting my visa was due to (a) inaccurate
information and (b) contradicting information that I found on the internet and on
various blogs. So for you, my sweet future <estudiante intercambio>, I have removed
the discrepancies and streamlined the process so you can make it to España without
having to learn any Spanish swear words before you get there.


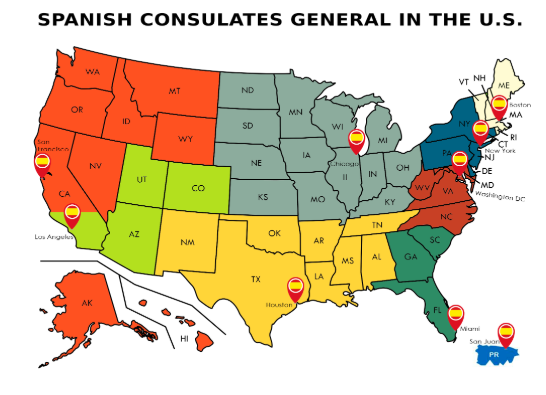
1. PSA: YOU HAVE TO GO TO
SAN FRANCISCO TO DROP OFF AND
PICK UP YOUR VISA IN PERSON.

I wish I had found this information as blatantly clear back when I started my visa quest.
Unfortunately, I didn’t find out until I dropped off my visa that I need to go back to
San Francisco in person to pick it up.

Depending on where you are a resident, you might be able to visit your home
state’s consulate, and their procedures may be different (email them to be sure!),
but please be aware that in San Francisco you have to drop off and pick up your
visa in person.
***There is one exception. You don’t necessarily have to drop off your visa paperwork
in person. There is the possibility that your parents can drop off the paperwork for you,
however you, and only you, can be the one to pick it up. As put more formally by the
San Francisco consulate:

“Visa applications must be filed in person. However, applications may also be filed by a
duly accredited representative if you do not reside in the town or city where the Diplomatic
Mission or Consular Office is located and you can demonstrate due cause preventing you from
travelling, such as the distance from the Diplomatic Mission or Consular Office in question,
transport difficulties that make the journey particularly problematic or accredited reasons
related to a sickness or physical condition that significantly reduces your mobility.”

Now that you are well aware of the logistics of dropping off and picking up the paperwork,
it’s time for the next step.

2. Book an appointment!

Go to the San Francisco consulate website (there is an English option in the top
right hand corner) to book it:


These appointments fill up QUICKLY. Seriously, I’m not joking it’s booked
out sometimes 4 months in advanced.

You can’t book an appointment 3 months prior to your date of departure,
so keep that in mind. Also, your visa will take somewhere between 2-4 weeks
until it is ready, so you’ll need to account for that when planning your appointment.
You wouldn’t want to drop it off in late July and have to leave for school in early
August and it not be ready, you understand what I mean.

My best advice is to get it done with sooner rather than later. After your visa is ready,
it can stay at the consulate for as long as you like. For example, I dropped mine off in
early November and then came back in January to pick it up on my way to Spain.
First thing first though, book an appointment!

3. Papers, documents, information, oh my!

FOR A SEMESTER you will need:

National visa application form and one copy (USE DAY/MONTH/YEAR FORMAT!!!)

Passport and ID, original document + one copy of each

Two passport sized photos (2in x 2in)

Original university acceptance letter and one copy

Evidence of funds - this can mean a notarized letter from your parents,
or a letter from the university saying that you are fully financially covered.

Here’s an example of the one that my parents wrote for me:


Public or private health insurance that covers you internationally while you 
are abroad. I used CISI which is very comprehensive and doesn’t do too much 
damage on your wallet.

FOR AN ACADEMIC YEAR you will need:

Everything I listed above.

All of this too:

4. Visa fee

You can either pay in check or cash. Checks can be made out to
the General Consulate of Spain in San Francisco.

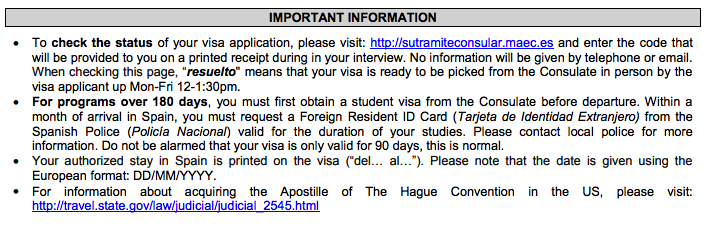
5. Other important information
to consider:


6. Make the most of your
time in San Francisco picking
up and dropping off your visa


Pacific Tradewinds Hostel is a great spot to stay that won’t live up to 
San Francisco's spendy reputation. 
Download the Muni Mobile App. You can get a 24 hour bus pass 
for $5 on your phone. It’s super easy and you can use it to get around 
everywhere without having to rent a car. 

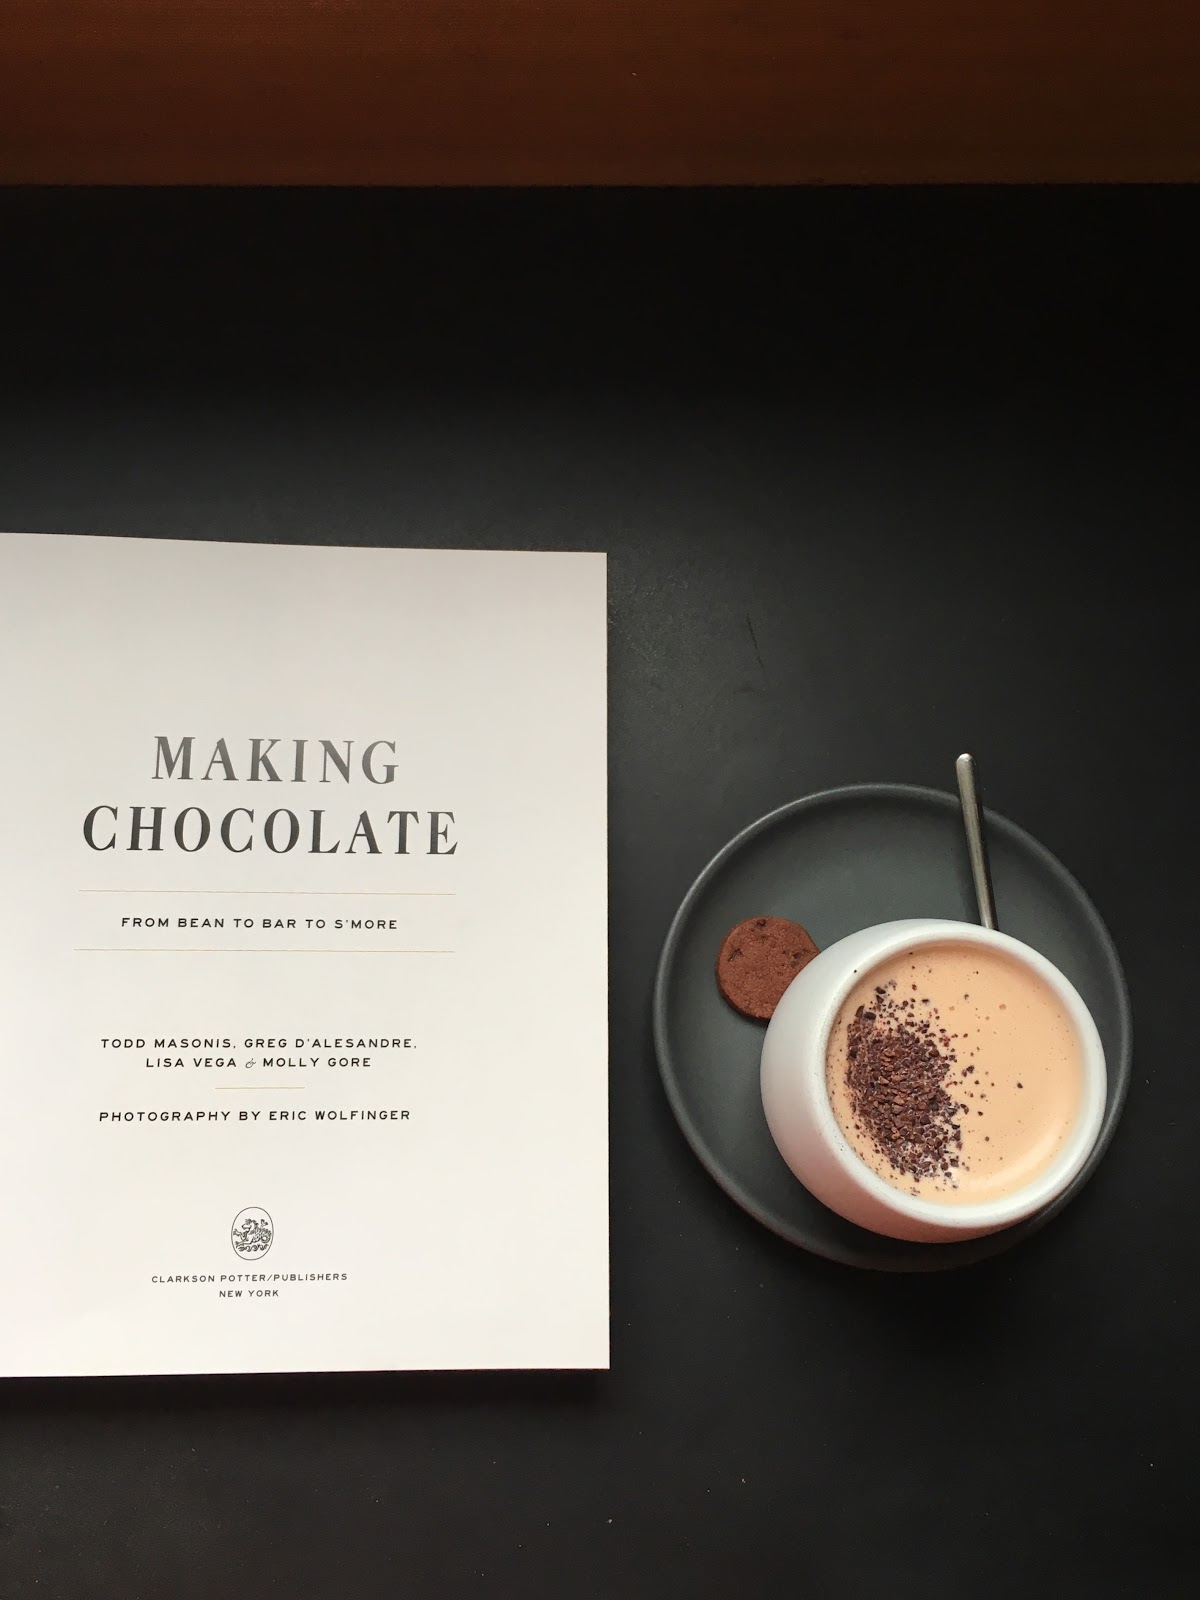
Check out Dandelion Chocolate (get the mission style hot chocolate) 
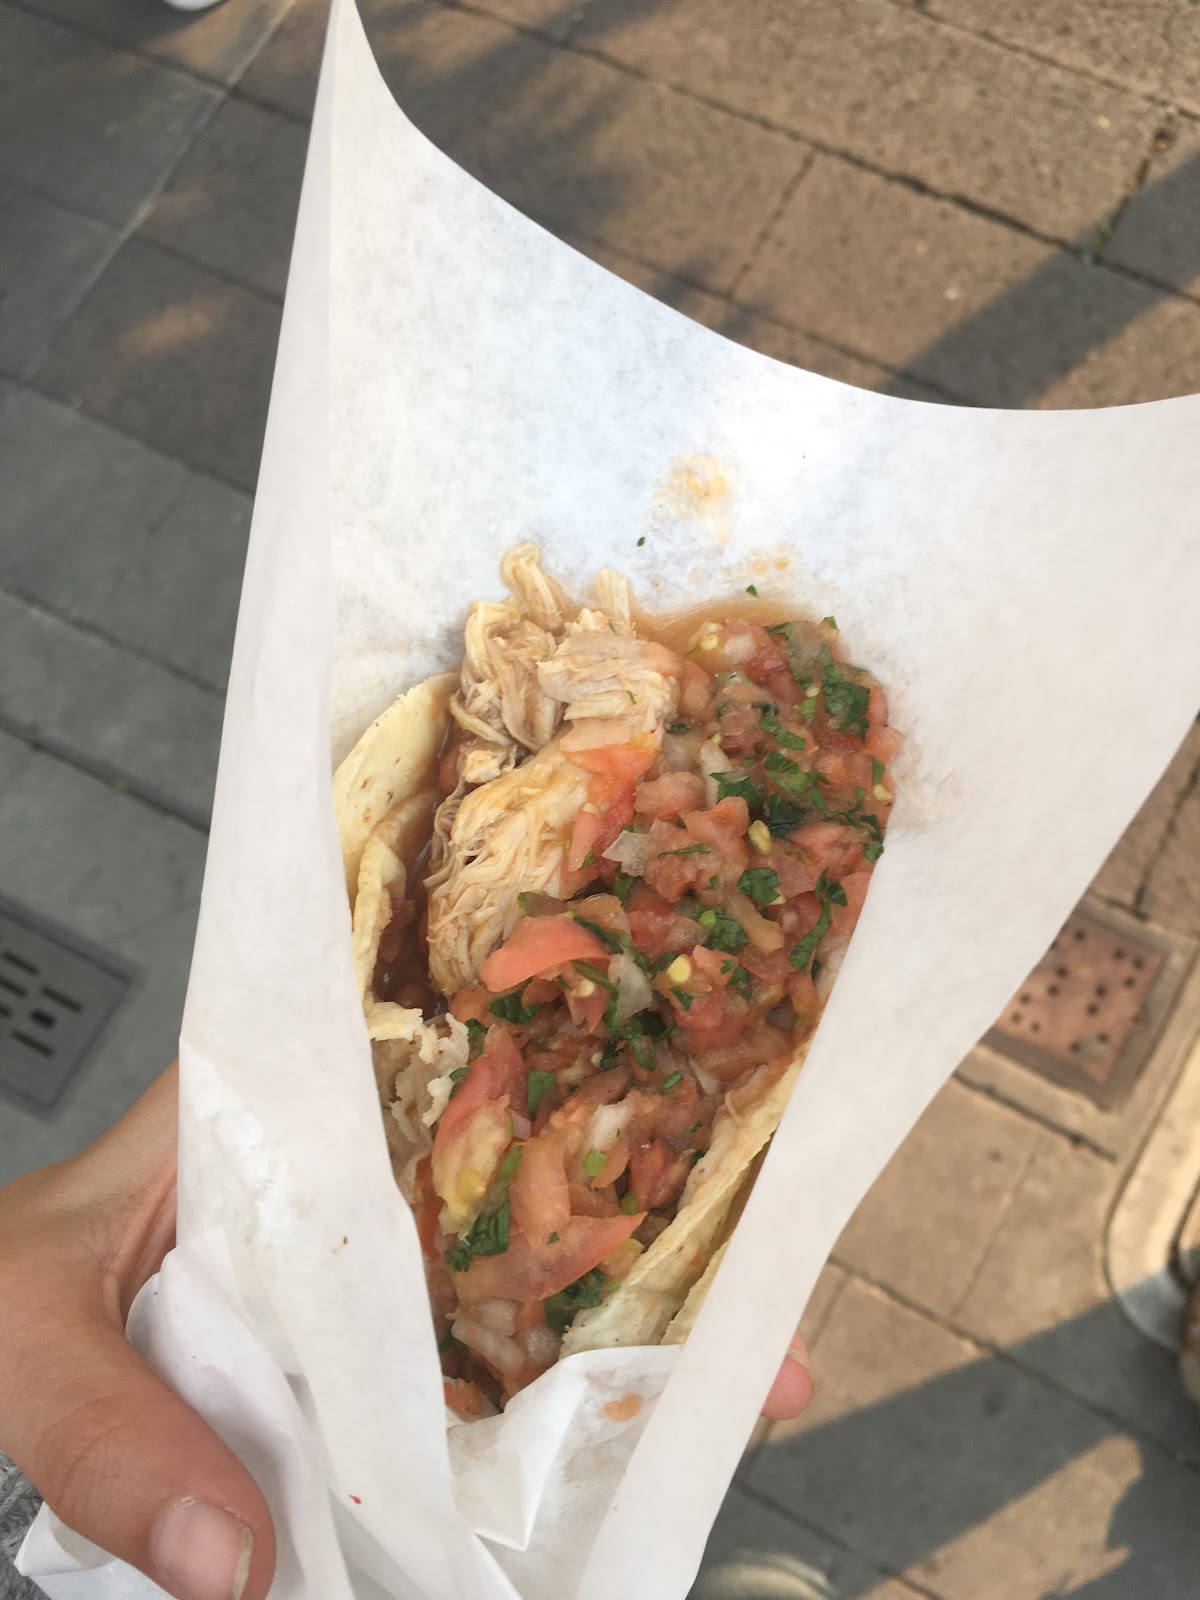
and La Taqueria (in the Mission District). 
I’m not kidding when I say these will be the best tacos you have 
ever had. Ever. 


    Walk or Run across the Golden Gate Bridge! It’s free and has amazing views. 

    Wander around Chinatown and North Beach (Little Italy area) and find yourself pleasantly surprised with the sights, smells, and sounds of the city. 


      If you are a “plant person” like me, then check out the Conservatory of Flowers.
      There’s a small entrance fee, and it’s cheaper if you are a student, so bring your student ID
      and a good book to read.


      7. ENJOY ESPAÑA!

      Thursday, January 17, 2019

      The lifeblood of London: The Tube

      If you want to get around London, the fastest and most organized way is via the 'Tube': aka the London Underground. No matter how far your want to go within the city, there is always an Underground station within reach. From the Circle Line to the Jubilee Line, the tube ensures you can get to any direction within London city as quickly as possible.
      Tube Map
      Finding an Underground station is fairly easy. Look out for the iconic red and blue circular symbol that marks the entrance to a station. Signs along the streets also point out the nearest station and how far they are walking distance.
                                                    

      To pay your fare, you can choose one of three options: pay for a ticket at a machine, use an Oyster Card, or use your contactless credit card. During my months in London, I primarily used an Oyster card to get around the train system. For many students, the Oyster card is the best choice for London public transport. Not only can you pay for the Underground, but all of the London buses take Oysters as payment too. In addition, as a student, you can apply for a student Oyster card that can save you on travel fare, which may be beneficial to you if you plan on commuting to school or going to town daily via the Underground. It is also very easy and quick to top up your card if you are running low: just insert it into a marked add-value machine, choose how much you would like to add (minimum 5 GBP), and pay via card or cash.
                                 Image result for citymapper london
      You might also want to download CityMapper: a free city-navigation map that is far more helpful than Google Maps off the shelf. With CityMapper, you have the entire London Underground system map stored on your phone. Furthermore you can even plan out your trip to work out how long will it take you to get to the destination, which carriage is best to get on to avoid getting into a jam, what lines you need to take (including transfers), and get an estimated time of arrival (based on my experiences, fully accurate). It is very useful due to the fact that it will notify you when you need to get off.  Do be aware though that in most Underground lines, there is no phone service or data available due to the lack of phone reception unlike some cities; therefore if you do need to rely on Citymapper: activate your phone carrier's Underground wi-fi service so you can continue using data-reliant apps while on the train.

      Here are some more tips and advice when it comes to using the Tube:

      • If a transfer between lines requires you to tap in or out your Oyster card/credit card, ensure you do it before you leave the line. Same goes for entering a paid area of a station: ensure the scanner reads the card. If you don't, you could be charged the full fare of 80 GBP as a penalty! 
      • There are no trash cans along the platforms. Following the terrorist attacks on July 7, 2005, the Transport for London removed all trash cans to eliminate any possible threats from hidden devices. So ensure you take your trash, or throw it away before getting on the train. 
      • Especially in the hotter periods of the year, it can get very stuffy and hot in the Tube. Ensure to bring plenty of water to hydrate yourself and wear loose clothing. 
      • You can bring food or drink onto the train, but be considerate and don't make too much of a mess in the carriage. 
      • While the risk of pickpockets is still present, currently the threat is minimal. But be vigilant of any unsavoury or suspicious passengers around you, especially if you are taking a late-night train or going to the outskirts of town. 
      • Most lines run until 1 or 2 AM, though there are night lines operational on some, that will keep going until the early morning. 
      • As the TfL reminds everyone: "If you see something, say something." Report any suspicious activities or possible dangers to a Transport police officer or Underground staff.